How to Assemble the HPA Kit with MAXX Model: Step-by-Step Guide and Version Compatibility
001
002
003
004
Installing an HPA kit with a MAXX Model chamber is not difficult, but there’s one key thing to understand first: not all MAXX chambers are the same, and the thickness of the kit is intentional, not a mistake. Once you understand this, the rest of the assembly becomes straightforward.
What to check before starting
Before picking up any tools, confirm three things:
- which MAXX Model version you have
- which screws you will use
- that the engine and chamber are clean and free of burrs or debris
This quick checklist avoids most common issues during the first installation.
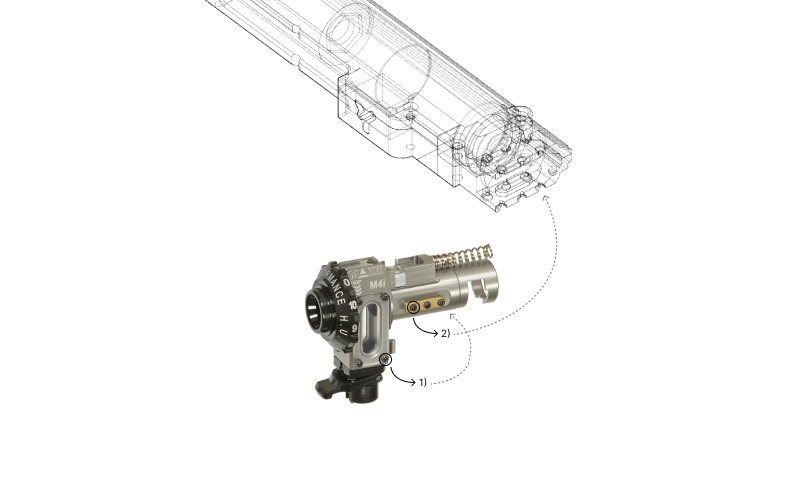
Step 1: identify your MAXX Model version
001
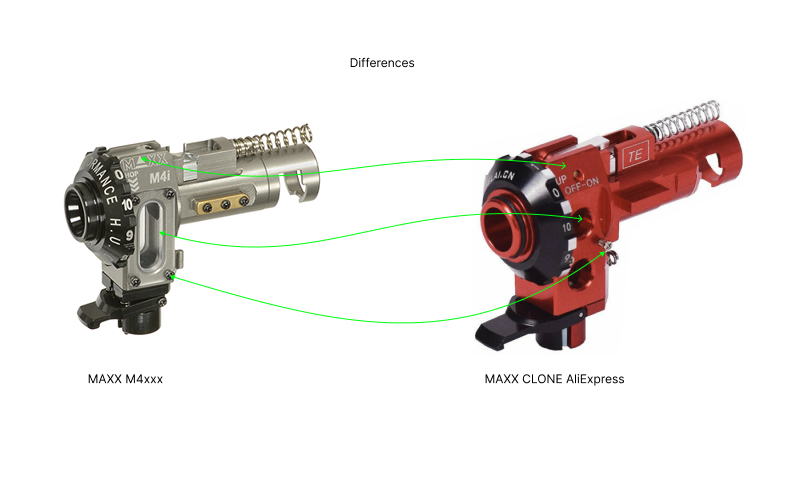
There are two main visual types:
Version 1 and AliExpress-style clones
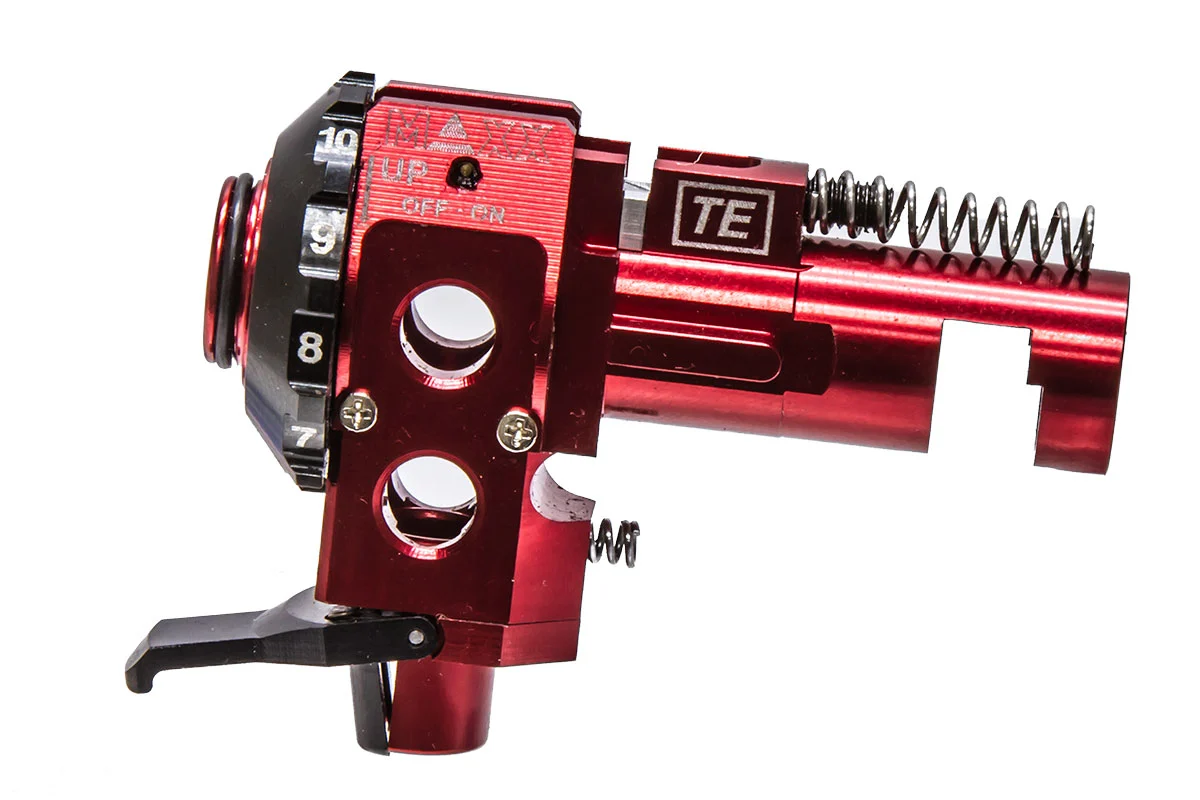
- two round side holes
- two screws holding the tracer unit
Current version
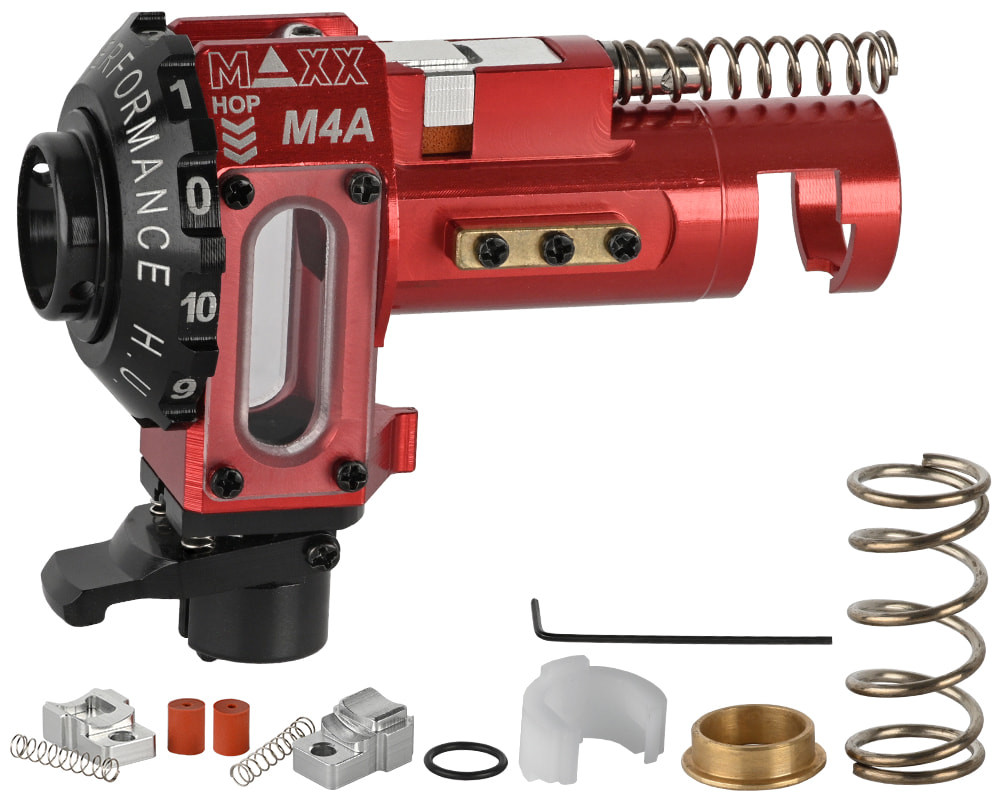
- one oval side hole
- four screws holding the window
Recognizing this difference helps you understand what hardware you’re working with and what tolerances to expect.
Step 2: understand why the kit has thicker sides
This is one of the most common doubts: the extra side thickness is intentional, not a defect.
What is it for?
- adds structural stability
- reinforces the printed part
- improves overall rigidity
The practical consequence: the original hop-up screws may be too short.
Step 3: use the correct screws
002
The recommended solution is simple: use the longer side screws included with the MAXX chamber, as they are better suited for the added thickness.
Practical tip
Before tightening fully:
- test-fit the assembly
- confirm screw length is sufficient
- thread by hand first to avoid cross-threading
Step 4: join the engine with the hop-up chamber
With everything identified and ready:
- connect the engine to the hop-up chamber
- ensure the fit is clean and without stress
- check that nothing interferes with movement or alignment
Take your time here. If something is misaligned at this stage, the rest of the assembly will not fix it.
Step 5: insert the assembly into the kit
Once the engine + hop-up block is assembled:
- insert it into the kit
- check that it seats properly
- align everything before closing the outer shell
Do not force it. If it doesn’t fit easily, check screws, burrs, or compatibility before continuing.
Step 6: close the outer shell
When everything is properly aligned:
- place the outer cover
- tighten gradually
- avoid fully tightening one side before the other
The goal is to distribute pressure evenly and avoid shifting the chamber.
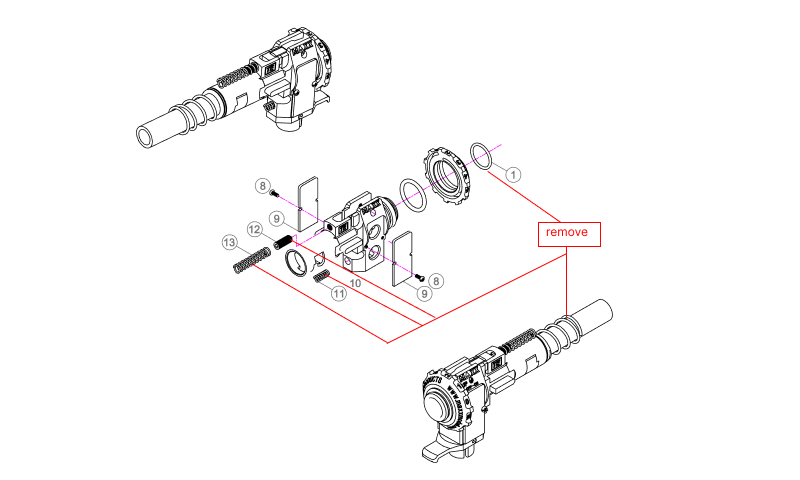
003
What you no longer need
With this system, you can eliminate the spring and O-rings often used in other setups to compensate for alignment. :contentReference[oaicite:0]{index=0}
This simplifies the build:
- fewer extra parts
- less trial-and-error adjustment
- cleaner and more consistent alignment
Final checks
- chamber is centered
- screws are not cross-threaded
- cover closes without excessive tension
- assembly fits in the replica correctly
- no reliance on springs or O-rings for alignment
004
Common mistakes
Thinking the extra thickness is a defect
It’s not — it’s part of the design.
Using short screws
A very common mistake. If they’re too short, switch to the longer MAXX screws.
Forcing the closure
If something doesn’t fit, stop. The issue is usually earlier: wrong screws, burrs, or poor alignment.
Keeping spring and O-rings out of habit
They are not needed in this system.
Quick troubleshooting
The cover doesn’t close properly
Check screw length, chamber seating, and engine alignment.
The chamber looks misaligned
Make sure there’s no lateral tension and that the assembly was aligned from the start.
The setup works but feels forced
Don’t ignore it. A forced assembly often leads to feeding issues or premature wear.
Quick FAQ
How do I identify my MAXX version?
Check side holes and screws:
- two round holes + two screws → older/clones
- one oval hole + four screws → current version
Does extra thickness mean a bad print?
No. It’s intentional and improves stability.
Which screws should I use?
The longer side screws included with the MAXX chamber.
Can I really remove spring and O-rings?
Yes — that’s one of the main advantages of this system.
Final note
Installing the HPA kit with MAXX Model is straightforward once you understand two things: which version you have and why the kit has thicker sides. From there, the process becomes much simpler and results in a cleaner, more reliable setup compared to traditional methods.