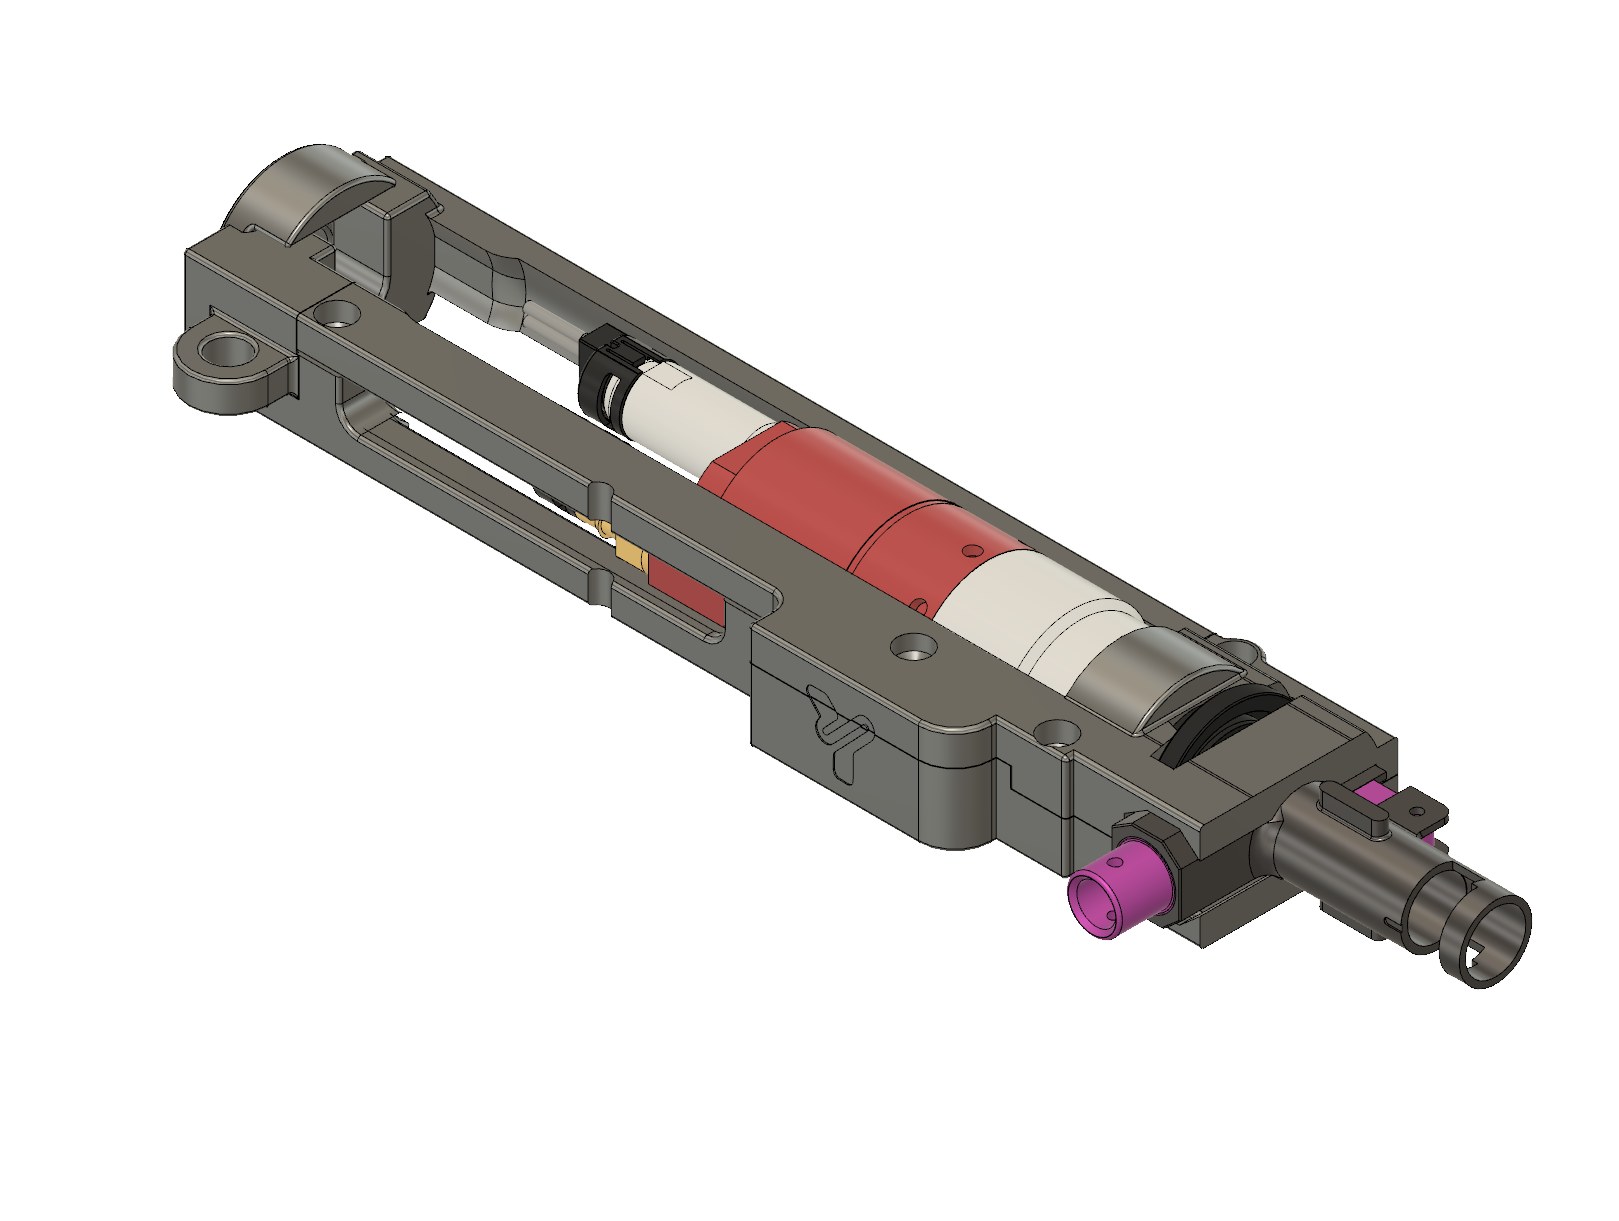
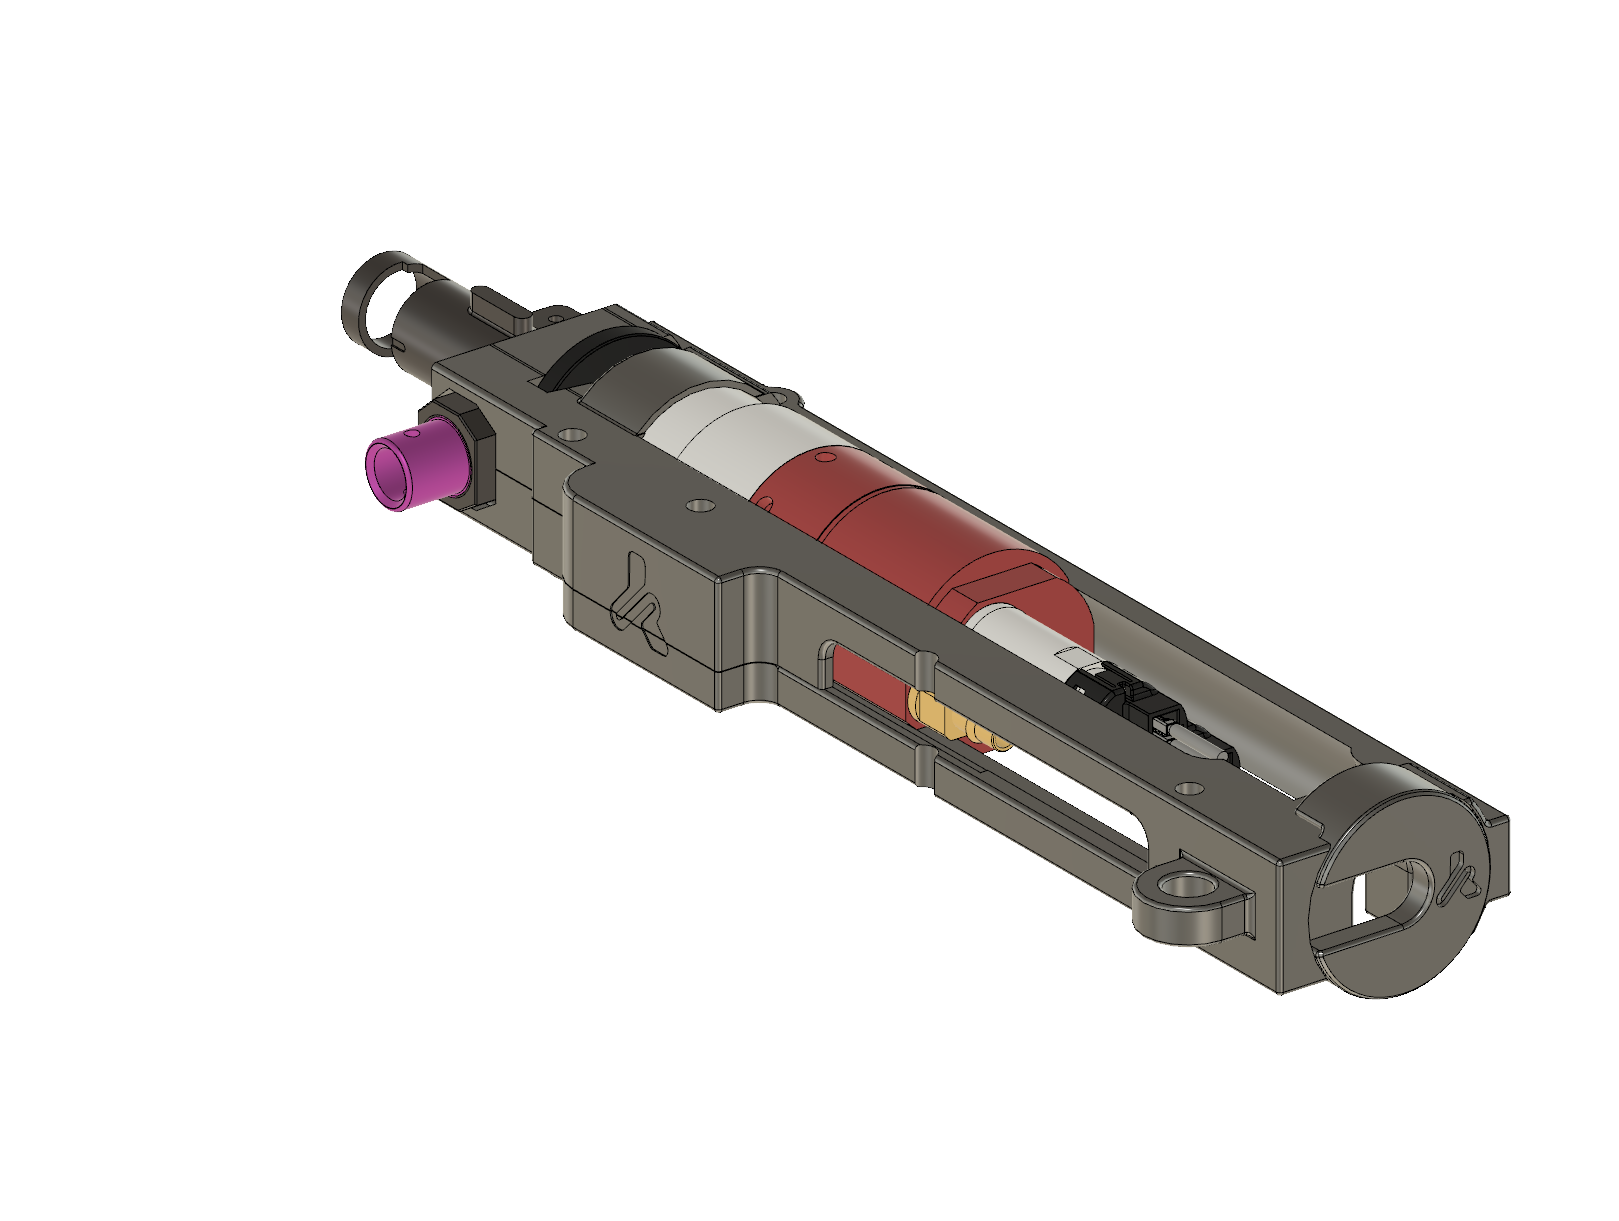
Version 2.1 of the hop-up alignment system, designed for M4 AEG HPA replicas using:
- PolarStar F2™ HPA Conversion Kit (dual-solenoid HPA engine, highly efficient and fully adjustable in pressure and air volume).
- Silent Industries ALPHA M4/16 AEG/HPA Chamber (CNC hop-up chamber with TRUE-TDC system, bucking lip tension ring, and barrel alignment groove, designed specifically for demanding HPA builds).
This kit ensures precise alignment between the F2 nozzle and the ALPHA chamber, allowing full advantage of the F2’s preloaded spring nozzle and the ALPHA’s bucking lip tension system to prevent double feeding and improve shot-to-shot consistency.
Compatibility
| Component | Compatibility |
|---|---|
| HPA Engine | PolarStar F2 M4 / V2 HPA Conversion Kit |
| Hop-up Chamber | Silent Industries ALPHA M4/16 AEG/HPA |
| Base Replica | M4 AEG |
| Gearbox | V2 / ICS SPLIT |
What the kit includes
- Rear clip for mounting via rear pin or fixed stock.
- Base with housing for M3 inserts (brass optional).
- Side clip for routing the HPA tube/line.
- Top cap for front locking of the ALPHA chamber, designed to respect its CNC geometry and barrel support.
- Rear plate with mounting point for an M5 screw that reinforces the assembly.
Installation and adjustment
-
Printing and preparation
- Print the parts with 65–80% infill.
- Lightly sand the internal areas and contact surfaces for a clean fit.
- You may apply dry lubricant or wax on sliding areas if you want to facilitate maintenance.
-
Installation in the replica
- Insert the base into the lower and install the M3 inserts in their housings.
- Place the rear clip aligned with the rear pin or the stock mounting point.
- Install the ALPHA chamber with the inner barrel, using the chamber’s own alignment groove; the top cap locks the assembly in the correct position.
- Route the F2 HPA line through the side clip to prevent tight bends or friction.
-
Final fixing and testing
- Secure the rear plate with an M5 screw and washer to maximize rigidity.
- Configure the PolarStar F2 within its pressure range (approx. 45–145 psi) and check that the preloaded spring nozzle feeds consistently without marking or over-pushing the BBs.
- Perform firing tests and adjust the ALPHA chamber hop-up using the tension ring depending on the BB weight and the bucking you use.
Required components (not included)
- 4× M3 inserts × 4.2 mm
- 4× M3 × 8 SHCS screws
(Standard hardware links used in the other kits can be reused here.)
Recommended lower
Using the ICS metal lower is recommended for very demanding builds.
If you prefer to print the lower receiver, these Gearbox v2 Lower "Universal lower part" models are compatible with this kit:
- Version 3
- Version 4.2
- Version 4.3 MTW
You can find them HERE.
3D printing parameters
- Approximate print time: ~1 h 30 min
- Recommended material: PLA+
- Layer height: 0.10 mm – 0.15 mm
Manuals
Installation and adjustment manuals are available in the Manuals section of the website or on the project’s Discord server.
Recommended products
The most recent models added to the collection